Friday, February 14, 2025

What is the Purpose of a Screw Air Compressor?

 A screw air compressor is a vital component in numerous industrial and commercial applications. Understanding its purpose and functionality can greatly enhance operational efficiency and productivity. This article delves into the various purposes of a screw air compressor, its advantages, and common uses.


Understanding the Basics of Screw Air Compressors


Screw air compressors utilize a pair of helical screws to compress air. This mechanical process distinguishes them from conventional piston-based compressors. As the screws rotate, air is drawn in, compressed, and subsequently discharged. This method ensures a continuous flow of high-quality compressed air, leading to enhanced efficiency.


The Main Purpose of Screw Air Compressors


The primary aim of a screw air compressor is to provide a reliable and consistent source of compressed air for various industrial uses. This includes powering pneumatic tools, material handling systems, and other machinery requiring compressed air as a pressurizing medium. The steady airflow provided by a screw compressor makes it ideal for continuous operations, which places it ahead of other compressor types in many settings.

Screw Air Compressor

Screw Air Compressor

Benefits of Using Screw Air Compressors


Several advantages make screw air compressors a popular choice in various industries:


  • Efficiency: Screw compressors operate at lower RPM compared to piston compressors, leading to reduced energy consumption.

  • Durability: They are built with robust components, allowing them to withstand demanding conditions and operate efficiently for longer periods.

  • Less Maintenance: With fewer moving parts, screw compressors often require less maintenance than their piston counterparts.

  • Noise Level: They typically operate more quietly, which is essential for maintaining a conducive working environment.


Common Applications of Screw Air Compressors


From manufacturing plants to small workshops, screw air compressors find applications across various industries:


  • Manufacturing: Used to operate assembly lines and power pneumatic machinery for tasks such as drilling or cutting.

  • Automotive: Essential in automotive repair shops for powering tools and air-driven machinery.

  • Construction: Used to power nail guns, air hammers, and other pneumatic tools on construction sites.

  • Food and Beverage: Employed in packaging and processing, ensuring that compressed air is free from contamination.


How Do Screw Air Compressors Compare to Other Types?


When comparing screw air compressors to piston and diaphragm compressors, screw models generally provide greater efficiency and lower operational costs. While piston compressors discharge air in bursts, which may cause fluctuations in pressure, screw compressors deliver a steady flow, essential for industrial applications that require constant pressure and volume. Additionally, screw compressors often feature advanced technologies that improve performance and energy efficiency.


Frequently Asked Questions


  1. What is the average lifespan of a screw air compressor?

  2. The average lifespan is around 10-15 years, particularly with regular maintenance.

  3. Are screw air compressors energy-efficient?

  4. Yes, screw compressors are known for their energy efficiency, reducing operational costs significantly.

  5. How loud are screw air compressors?

  6. They typically operate at lower noise levels compared to other compressors, making them suitable for indoor use.

  7. What sizes do screw air compressors come in?

  8. They are available in various sizes, from compact units for small workshops to large-scale systems for industrial plants.

  9. Can screw air compressors be used in cold environments?

  10. Yes, but specific adaptations may be needed to maintain performance in extreme temperatures.


Conclusion


In summary, screw air compressors play an essential role in a wide array of applications, providing reliable and efficient compressed air solutions. Their advantages, including efficiency, durability, and less maintenance, make them highly sought after in industrial settings. Whether in manufacturing, automotive, or construction, understanding the purpose of a screw air compressor can enhance operational effectiveness and ultimately contribute to the overall success of an enterprise.

Tuesday, February 11, 2025

Buying Tungsten Carbide Burs - 4 Tips and Things To Know

 Tungsten carbide burs are essential tools for various industries, including dentistry, metalworking, and jewelry making. Known for their durability and precision, these burs are used for cutting, shaping, and grinding hard materials. Choosing the right tungsten carbide burs can significantly impact the quality of your work and the lifespan of the tools. This guide provides key tips and insights to help you make an informed decision when purchasing tungsten carbide burs.


1. Understand the Different Types of Tungsten Carbide Burs


Know the Shank Types: Tungsten carbide burs come in different shank types, including friction grip (FG), latch-type (RA), and straight handpiece (HP) shanks. Selecting the right shank type depends on the equipment you are using. For example, FG burs are commonly used in high-speed dental handpieces, while RA burs are suitable for low-speed contra-angle handpieces.


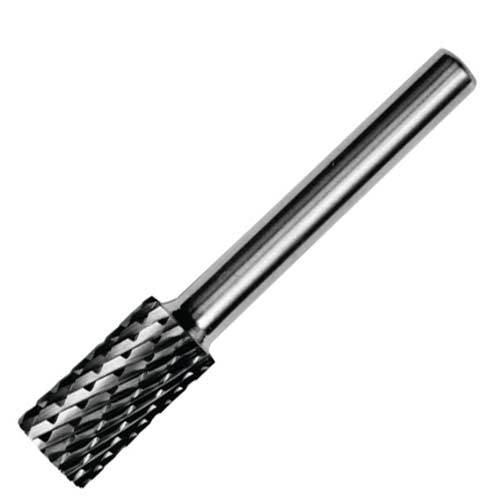
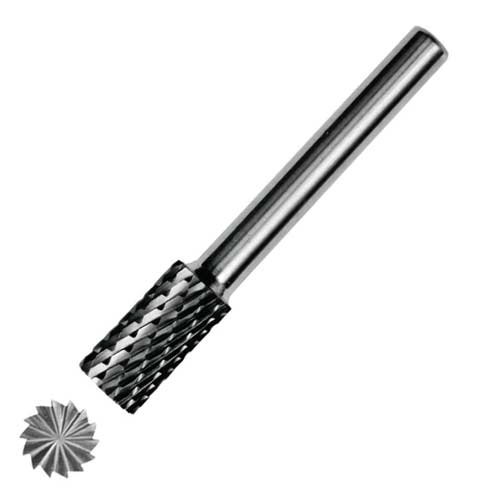
Choose the Right Head Shape: Tungsten carbide burs are available in various head shapes, such as round, flame, cylindrical, and cone. Each shape serves a specific purpose, so choosing the right one depends on the task at hand. For instance, round burs are ideal for creating concave shapes, while cylindrical burs are used for smoothening and trimming flat surfaces. Understanding the different head shapes and their applications will help you select the most suitable burs for your needs.

Cylindrical Type Tungsten Carbide Burs

Cylindrical Type Tungsten Carbide Burs

2. Pay Attention to the Bur's Grit and Cutting Edges


Determine the Grit Level: The grit level of tungsten carbide burs affects the smoothness of the cut and the finish on the material. Coarse burs have larger cutting edges, making them suitable for rapid material removal. Fine burs, on the other hand, have smaller cutting edges for precision work and creating a smoother finish. Depending on your application, you may need to choose between coarse, medium, and fine grit burs to achieve the desired results.


Check the Cutting Edges: Tungsten carbide burs can have single, double, or cross-cut cutting edges. Single-cut burs produce a smooth finish and are often used for general shaping. Double-cut burs have crisscrossed cutting edges, allowing for faster material removal and reducing vibration during use. Cross-cut burs provide an even finer finish, making them ideal for delicate tasks that require high precision. Understanding the differences between these cutting edges will help you choose the burs that best match your work requirements.


3. Consider the Quality and Brand of the Burs


Look for High-Quality Material: Not all tungsten carbide burs are created equal. High-quality burs are made from premium tungsten carbide material, offering superior durability and cutting performance. Investing in high-quality burs will ensure a longer lifespan, reduced wear and tear, and consistent performance. Low-quality burs may wear out quickly, leading to poor results and increased costs in the long run.


Choose a Reputable Brand: The brand you choose plays a significant role in the quality and reliability of the tungsten carbide burs. Reputable manufacturers adhere to strict quality control standards and use advanced manufacturing techniques to produce high-performance burs. Researching and selecting a trusted brand can give you confidence in the product's performance and ensure you get value for your investment.

Cylindrical Type Tungsten Carbide Burs

Cylindrical Type Tungsten Carbide Burs

4. Evaluate the Compatibility with Your Equipment


Check the Shank Size: Tungsten carbide burs come in different shank sizes, such as 1/4-inch, 1/8-inch, and 3/32-inch. It's essential to choose burs that are compatible with your specific equipment. Using the correct shank size ensures a secure fit in the handpiece and minimizes the risk of damage to both the bur and the equipment.


Ensure Proper Fit and Balance: An improper fit or imbalance can lead to excessive vibration, reduced control, and potential damage to the material being worked on. Before purchasing, verify that the tungsten carbide burs are designed to fit your handpiece correctly. This not only ensures optimal performance but also enhances safety during use.


Frequently Asked Questions About Tungsten Carbide Burs


Q1: Can tungsten carbide burs be used on all materials?

A: Tungsten carbide burs are versatile and can be used on a wide range of materials, including metals, ceramics, plastics, and wood. However, they are most commonly used for cutting and shaping hard materials like metal and ceramics due to their hardness and durability.


Q2: How do I maintain tungsten carbide burs for a longer lifespan?

A: To extend the lifespan of tungsten carbide burs, clean them regularly to remove debris and residue. Use appropriate cleaning solutions and brushes to avoid damaging the cutting edges. Additionally, avoid applying excessive pressure during use, as this can cause premature wear and reduce the bur's efficiency.


Q3: How often should tungsten carbide burs be replaced?

A: The replacement frequency depends on the intensity of use and the materials being worked on. Regularly inspect the burs for signs of wear, such as dullness, chipping, or reduced cutting performance. Replacing worn burs promptly ensures consistent results and prevents damage to the workpiece.


Conclusion


When buying tungsten carbide burs, it's crucial to consider factors such as bur type, grit level, quality, and compatibility with your equipment. By understanding these aspects and selecting the right burs for your needs, you can achieve precise and efficient results while extending the lifespan of your tools. Investing in high-quality tungsten carbide burs from reputable brands ensures reliable performance, whether you're using them for dental procedures, metalworking, or other applications.

Saturday, February 8, 2025

What Not to Do With a Floor Jack?

 A floor jack is an essential tool for lifting vehicles safely and effectively during maintenance or repair work. However, improper use of a floor jack can lead to dangerous situations, damage to the vehicle, or injury. Understanding the dos and don’ts of floor jack usage is crucial for ensuring safety and maintaining the longevity of your equipment.


In this guide, we’ll cover what you should avoid when using a floor jack to ensure safe operation and prevent accidents or damage.


1. Don’t Lift a Vehicle on an Uneven Surface


One of the most important rules for using a floor jack is to ensure the surface you are working on is level and stable. Using a floor jack on uneven ground, such as a sloped driveway, gravel, or dirt, can cause the jack to become unstable and potentially tip over. This instability increases the risk of the vehicle falling, which can lead to serious injury or damage.


Always use a floor jack on a flat, solid surface like a garage floor or a paved driveway. For additional safety, make sure to chock the wheels that remain on the ground to prevent the vehicle from rolling while lifted.

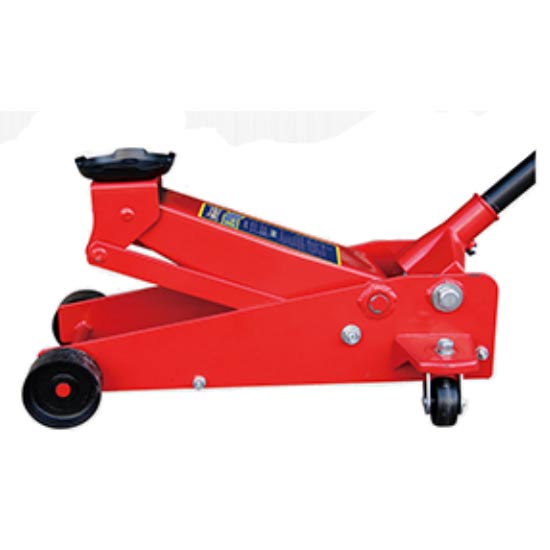
2.25 Ton Hydraulic Floor Jack

2.25 Ton Hydraulic Floor Jack

2. Don’t Exceed the Floor Jack’s Weight Capacity


Each floor jack is designed to lift a specific amount of weight, known as its weight capacity. Exceeding this limit can cause the jack to fail, resulting in the vehicle falling unexpectedly. It's crucial to check the weight capacity of your floor jack and ensure it is sufficient to handle the weight of the vehicle you are lifting.


Before lifting, consult your vehicle’s manual to determine its weight and ensure it does not exceed the floor jack’s capacity. Typically, jacks come with ratings like 2-ton, 3-ton, or 4-ton, so always choose the appropriate one for your needs.


3. Don’t Crawl Under the Vehicle Without Jack Stands


One of the most dangerous mistakes you can make is working under a vehicle supported only by a floor jack. A floor jack is not designed to hold a vehicle for extended periods or as a substitute for jack stands. Hydraulic jacks can fail without warning, causing the vehicle to drop suddenly.


Always use jack stands to support the vehicle after lifting it with a floor jack. Place the jack stands under secure lifting points, as specified in your vehicle’s manual, and lower the vehicle onto the stands before working underneath. Never trust the floor jack alone to support the weight of the vehicle while you’re working.


4. Don’t Use the Wrong Lifting Points


Vehicles have designated lifting points that are reinforced to handle the weight of the car when being raised by a jack. Using a floor jack on the wrong part of the vehicle, such as under a body panel or exhaust system, can result in damage to the car and create unsafe lifting conditions.


Refer to your vehicle’s manual to locate the proper jack points. Using the correct lifting points ensures that the vehicle is balanced and prevents damage to its frame or other components.

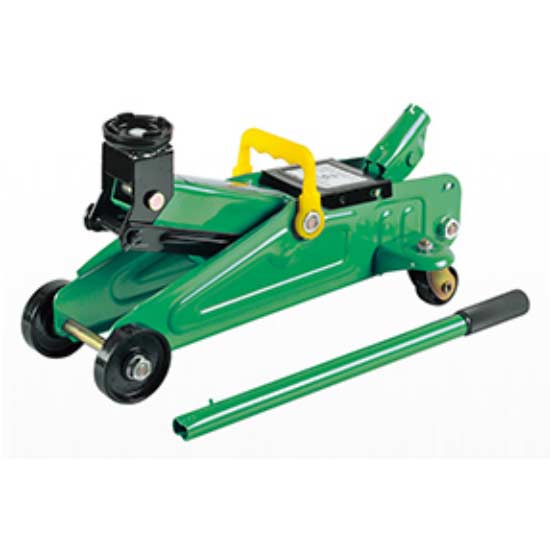
2 Ton Hydraulic Floor Jack

2 Ton Hydraulic Floor Jack

5. Don’t Rush the Lifting Process


Rushing while using a floor jack can lead to errors and accidents. Taking shortcuts, such as lifting the vehicle too quickly or not ensuring the jack is securely positioned, can create unsafe conditions.


When using a floor jack, take your time and follow the proper procedures. Slowly raise the vehicle to avoid shifting or instability, and make sure the jack is centered under the lifting point before applying pressure.


6. Don’t Neglect Floor Jack Maintenance


Like any tool, a floor jack requires regular maintenance to function properly. Neglecting maintenance can lead to hydraulic leaks, broken seals, or other malfunctions that compromise the jack’s performance.


Regularly inspect your floor jack for signs of wear, such as leaking hydraulic fluid, rust, or bent parts. Keep the jack clean, lubricate its moving parts, and store it in a dry, secure place when not in use. Following the manufacturer’s maintenance guidelines will help extend the life of your floor jack and ensure it operates safely.

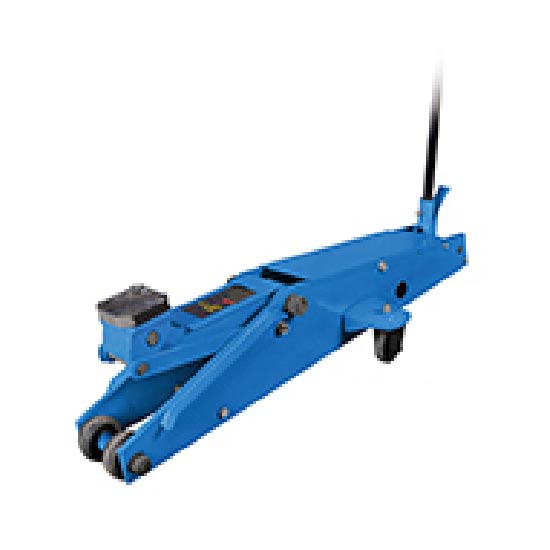
Long Floor Jack

Long Floor Jack

7. Don’t Overlook the Importance of Wheel Chocks


Before lifting your vehicle, it’s essential to use wheel chocks to prevent the vehicle from rolling. This is particularly important when lifting one end of the car, as the remaining wheels on the ground can move if not properly secured.


Place wheel chocks on both sides of the wheels that remain on the ground. This simple step helps prevent accidental movement and keeps the vehicle stable during the lifting process.


8. Don’t Leave the Vehicle Unattended While It’s Lifted


Once your vehicle is lifted, it’s important not to leave it unattended for an extended period. The longer the vehicle remains elevated, the higher the risk of the jack or jack stands shifting or failing.


If you need to step away from the vehicle for any reason, make sure it is securely supported by jack stands. Never leave a vehicle raised on a floor jack without additional support for extended periods.


Questions and Answers


**Q: How much weight can a floor jack lift?**

A: The weight capacity of floor jacks varies, but common ratings include 2-ton, 3-ton, and 4-ton jacks. Always choose a jack with a capacity that exceeds the weight of your vehicle to ensure safe lifting.


**Q: Can I leave my vehicle on a floor jack overnight?**

A: No, it’s not safe to leave a vehicle supported solely by a floor jack for extended periods. Use jack stands to support the vehicle if it needs to remain lifted for any length of time.


**Q: What should I do if my floor jack starts leaking hydraulic fluid?**

A: If your floor jack is leaking hydraulic fluid, stop using it immediately. A leak can indicate a problem with the jack’s seals or internal components. Have it inspected and repaired by a professional before using it again.


Conclusion


Using a floor jack properly is essential for ensuring your safety and the integrity of your vehicle. Avoiding common mistakes such as lifting on uneven surfaces, exceeding weight limits, or failing to use jack stands can help prevent accidents and prolong the life of your equipment. By following the guidelines outlined in this article, you can safely and effectively use your floor jack for vehicle maintenance and repairs.


Thursday, February 6, 2025

A Guide to Chisel Types and How to Use Them

 Chisels are versatile hand tools used for cutting, carving, and shaping materials such as wood, metal, and stone. Choosing the right chisel for a specific task is essential for achieving precision and quality in your work. This guide will walk you through the different types of chisels and how to use them effectively.


1. Bevel Edge Chisel


Bevel edge chisels are one of the most common types used in woodworking. They have a thin blade with beveled edges, making them ideal for fine, delicate work like fitting joints, trimming, and paring. These chisels are perfect for getting into tight corners and detailed carving tasks.


How to Use: Bevel edge chisels are typically used with a mallet for controlled cuts. Hold the chisel at a shallow angle when paring and apply even pressure for precise results. When working on joints, ensure the bevel edge chisel fits into the recess without forcing it, which could damage the workpiece.

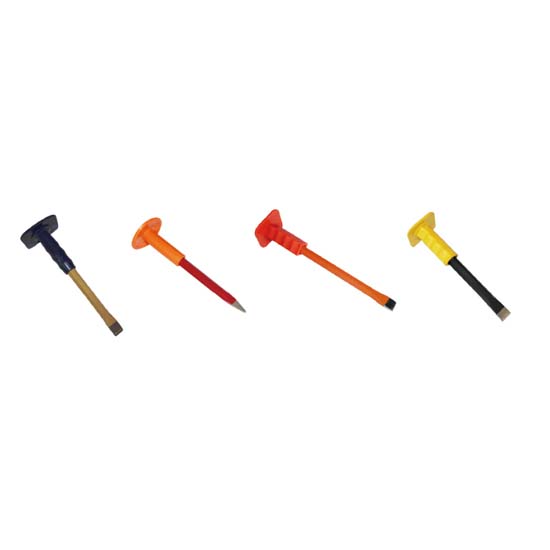
Cold Chisel

 Cold Chisel

2. Mortise Chisel


Mortise chisels are designed for cutting deep, square holes (mortises) in wood. They have thick, sturdy blades that can withstand heavy mallet strikes, making them ideal for cutting through tough materials. These chisels are used in joinery to create mortise and tenon joints, commonly seen in furniture making.


How to Use: Mortise chisels are used with a mallet to create deep cuts. Start by marking the mortise outline on the wood, then make a series of cuts along the marked lines. Gradually chisel out the material inside the mortise, ensuring even and steady pressure with each strike.


3. Paring Chisel


Paring chisels have long, thin blades and are used for fine, delicate paring work, such as smoothing surfaces and trimming joints. These chisels are not meant for heavy striking with a mallet but are instead used for hand-controlled, light cuts. The long blade offers excellent control and precision.


How to Use: Paring chisels are used by hand, without a mallet. Hold the chisel at a shallow angle to the workpiece and use smooth, controlled strokes to remove thin layers of material. Paring chisels are ideal for refining the fit of joints and creating clean, precise surfaces.


4. Firmer Chisel


Firmer chisels have thicker, rectangular blades that make them stronger and more robust than bevel edge chisels. These chisels are designed for general woodworking tasks and can handle heavier work, such as rough shaping and carving. They are suitable for tasks where more force is needed.


How to Use: Firmer chisels can be used with or without a mallet, depending on the task. For heavier cuts, strike the chisel with a mallet, ensuring the blade is held securely. For lighter tasks, use hand pressure to guide the chisel along the workpiece.


5. Cold Chisel


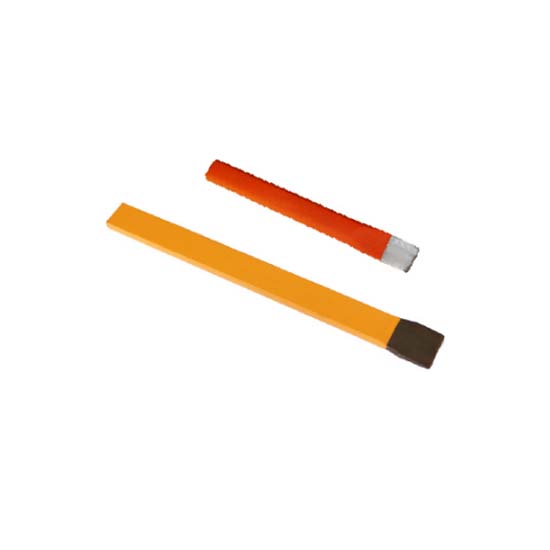
Cold chisels are used for cutting and shaping hard materials like metal and stone. They are made from hardened steel and have a flat cutting edge designed to withstand heavy strikes from a hammer. Cold chisels are commonly used in metalworking for cutting through bolts, rivets, and other metal parts.


How to Use: Cold chisels are used with a hammer. Position the chisel on the metal and strike it with the hammer to create a cut. Make sure to wear protective gear, such as safety glasses, to protect yourself from flying metal chips during use.

Flat Cold Chisel

Flat Cold Chisel

6. Gouge Chisel


Gouge chisels have a curved blade, making them ideal for scooping out material and creating concave shapes. They are commonly used in wood carving and sculpting to add intricate details to projects. Gouge chisels come in different sizes and curvatures, allowing for versatility in shaping work.


How to Use: Gouge chisels are typically used by hand, though light mallet strikes can be used for deeper cuts. Hold the chisel at a slight angle and push or pull it along the surface of the material to create the desired curve. Adjust the pressure based on the depth of cut needed.


Questions and Answers about Chisel Types

Q: What is the main difference between a bevel edge chisel and a firmer chisel?

A: Bevel edge chisels are thinner with beveled edges for fine, detailed work, while firmer chisels have thicker, rectangular blades for heavier woodworking tasks.


Q: Can I use a cold chisel on wood?

A: Cold chisels are designed for cutting metal and stone, so they are not suitable for woodworking. For wood, use chisels like bevel edge or firmer chisels instead.


Q: How do I sharpen my chisels?

A: To sharpen chisels, use a sharpening stone or honing guide. Hold the chisel at the correct angle and move it back and forth on the stone to create a sharp, even edge.


Understanding the different types of chisels and how to use them will enhance your craftsmanship and allow you to choose the right tool for each task. With the proper technique and maintenance, chisels can be powerful tools for a wide range of projects.