Monday, June 30, 2025

Guidelines for Buying an LED Work Light

LED work lights are essential tools for many industries, providing reliable, bright illumination for workspaces, construction sites, and home projects. With a wide variety of LED work lights available, selecting the right one can be challenging. This guide will walk you through key factors to consider when buying an LED work light to ensure you choose a light that meets your needs, provides quality illumination, and offers excellent durability.


1. Determine the Brightness and Lumens Needed


Brightness is one of the most important aspects to consider when buying an LED work light. The brightness of LED lights is measured in lumens, and higher lumens typically mean brighter light. For tasks requiring

intense, focused light (e.g., auto repairs or construction), choose a work light with at least 2,000 lumens. For smaller tasks or spaces, a light with lower lumens may suffice. Ensure the brightness level is appropriate for your work environment, as too much brightness can cause glare, while too little can lead to poor visibility.


2. Look for Adjustable and Portable Designs


The design of an LED work light can significantly impact its ease of use. Adjustable designs, such as lights with adjustable heads or telescopic stands, offer flexibility and allow you to direct light precisely where you need it. If you need a portable work light, consider options that are compact, lightweight, and battery-powered. Some LED work lights also come with carrying handles or built-in hooks, making them easy to transport and position in different locations.


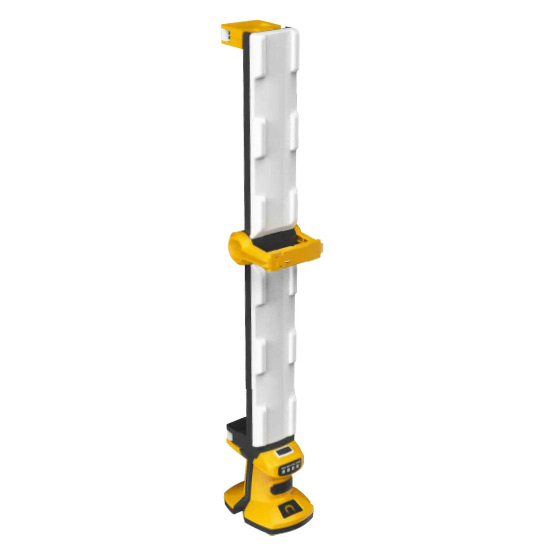
Rechargeable Multifunctional Work Light


3. Check Battery Life and Power Source Options


Work lights may be powered by rechargeable batteries, AC outlets, or a combination of both. Battery-powered LED work lights offer convenience for outdoor or remote work sites but ensure the battery life is sufficient for your needs. Look for lights with longer battery life if you need extended periods of use, or choose models with replaceable batteries for added flexibility. For indoor or continuous use, AC-powered work lights may be a better choice, as they can be plugged directly into a power source without concern for battery depletion.


4. Assess the Durability and Build Quality


LED work lights are often used in tough environments, so durability is a crucial factor. Look for models with robust construction materials, such as aluminum or heavy-duty plastic, to withstand impacts and rough handling. Waterproof and dustproof ratings, such as IP65 or higher, are also beneficial if you’ll be using the light in damp or dusty conditions. Durable lights last longer and perform reliably, even under challenging conditions.


5. Evaluate Heat Dissipation Features


LEDs are energy-efficient and generate less heat than traditional lighting, but powerful LED work lights can still produce some heat over extended use. Choose a work light with heat-dissipating features, like a metal housing with built-in heat sinks, to ensure that the light doesn’t overheat. Proper heat dissipation helps extend the lifespan of the LED and ensures safer, cooler operation for the user.


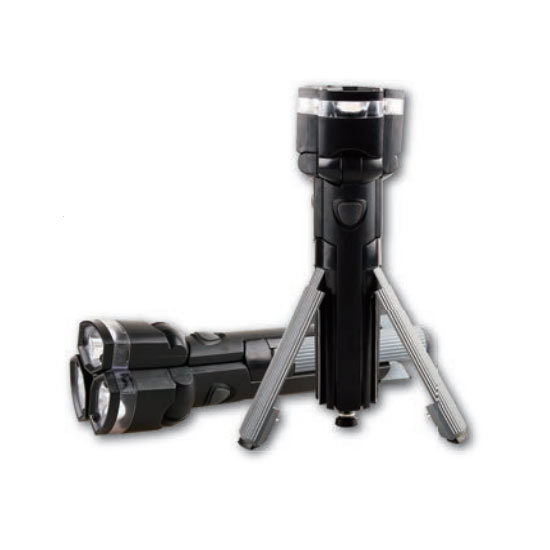
Three Head Worklight
6. Consider Additional Features for Convenience


Some LED work lights come with added features that enhance usability, such as dimmable brightness settings, adjustable color temperature, and multiple mounting options. Dimmable lights allow you to control the brightness for different tasks, while adjustable color temperature (e.g., warm or cool light) can improve visibility and reduce eye strain in different environments. Other useful features include magnetic bases, detachable stands, or swivel heads, providing more flexibility and convenience.


FAQs About Choosing an LED Work Light


Q: How many lumens are suitable for an LED work light?

The ideal lumens will depend on your specific task. For indoor tasks, 1,000-2,000 lumens should be sufficient, while larger projects, like construction, may require work lights with 3,000 lumens or more for proper visibility.


Q: Is it better to choose a rechargeable LED work light?

A rechargeable LED work light is ideal if you need portability and flexibility, especially for outdoor or remote tasks. However, for continuous indoor use, an AC-powered light may be more practical.


Q: What does IP65 mean in LED work lights?

IP65 is a rating that indicates the light is protected against dust and low-pressure water jets from any direction. This is essential for work environments exposed to dust or moisture, ensuring durability and reliable performance.


By considering these guidelines, you can select an LED work light that provides the brightness, durability, and features you need for optimal performance. Investing in a high-quality LED work light ensures safe, efficient lighting for all your work-related needs.


Looking for the best LED work lights?


At Auto Tools Depot, Find the best LED work light for you project needs. It’s important to have good lighting in the space in which you’re working. Portable work lights, LED lights for large work areas and handheld work lights are options that can brighten any work area.

Tuesday, June 24, 2025

​A Guide to Choosing the Best Hydraulic Jack

 Hydraulic jacks are essential tools for lifting heavy loads, such as vehicles, machinery, and other equipment. Whether you need a jack for personal use in a garage or for professional, heavy-duty applications, choosing the right type and capacity of hydraulic jack is crucial for safe and effective lifting. This guide will walk you through the various types of hydraulic jacks, key features to consider, and tips for selecting the best jack for your specific needs.


1. Understand the Types of Hydraulic Jacks


Hydraulic jacks come in different designs to cater to various lifting requirements. Here’s a look at some of the most common types:


Bottle Jacks: These are compact, powerful jacks with a vertical lifting design. They’re ideal for high-capacity lifting in situations with enough clearance and are often used for trucks, SUVs, and industrial applications.

Floor Jacks: Known for their low profile and horizontal design, floor jacks are versatile and suitable for vehicles with low ground clearance, such as cars. They’re popular for use in auto repair shops and garages.

Scissor Jacks: Though not hydraulic, scissor jacks are often included in this category for comparison. They’re lightweight, compact, and commonly used for emergency vehicle repairs. However, they don’t provide the same lifting power as hydraulic jacks.

Transmission Jacks: Specially designed to help remove and install vehicle transmissions, these jacks have high lifting capabilities and allow for precise adjustments, making them essential for mechanics and automotive professionals.

8 Ton Hydraulic Double Ram Bottle Jack

8 Ton Hydraulic Double Ram Bottle Jack

2. Check the Weight Capacity


The weight capacity of a hydraulic jack is one of the most critical factors to consider. Jacks are rated by the maximum weight they can lift, which typically ranges from 2 tons to over 50 tons for industrial-grade jacks. To ensure safety, choose a jack with a capacity that’s at least 25% higher than the heaviest load you plan to lift. For example, if you need to lift a vehicle that weighs 4,000 pounds, a 2.5-ton jack would be the minimum recommendation.


3. Assess the Lifting Height


Each jack has a maximum and minimum lifting height, which determines how high and how low it can reach. Make sure the jack can achieve the required height for your specific application. For vehicles, this means it should be able to fit under the frame and lift the vehicle high enough for repairs or maintenance. Bottle jacks tend to have a higher maximum height but may not fit under low-clearance vehicles, whereas floor jacks are better suited for low-clearance applications.


4. Consider Build Quality and Material


A well-constructed hydraulic jack is essential for durability and safety. Look for jacks made of high-quality steel or aluminum, as these materials provide the best strength and durability. Steel jacks are sturdy and typically have a higher lifting capacity, while aluminum jacks are lighter and more portable. For heavy-duty applications, steel jacks are usually recommended for their robustness, while aluminum jacks are ideal for on-the-go or occasional use.

100 Ton Hydraulic Bottle Jack

100 Ton Hydraulic Bottle Jack

5. Check Portability and Weight


If you plan to transport your jack frequently, consider its weight and portability features. While bottle jacks are compact and easy to carry, floor jacks are usually heavier and more cumbersome to move. Some floor jacks come with wheels or handles, making them easier to transport within a workspace. Aluminum jacks are generally lighter than steel, offering a good balance of portability and strength.


6. Look for Safety Features


Safety should be a top priority when selecting a hydraulic jack. Some jacks come equipped with safety mechanisms, such as overload valves that prevent lifting loads beyond the rated capacity. Locking mechanisms, release valves, and anti-slip pads also enhance stability and safety. Be sure to choose a jack with these features to minimize the risk of accidents during use.


Frequently Asked Questions About Choosing a Hydraulic Jack


Q: Which type of jack is best for low-clearance vehicles?

A: Floor jacks are ideal for low-clearance vehicles due to their horizontal design and low profile, allowing them to slide easily under cars with limited ground clearance.

Q: How often should I inspect and maintain my hydraulic jack?

A: Regularly inspect your hydraulic jack for signs of wear, oil leaks, and damage before each use. Routine maintenance, including checking and replenishing hydraulic fluid, ensures optimal performance and extends the life of the jack.

Q: Can I use a bottle jack for any vehicle?

A: While bottle jacks are powerful and versatile, they may not fit under vehicles with low clearance. They are best suited for trucks, SUVs, and other high-clearance vehicles.


Conclusion


Choosing the best hydraulic jack depends on the weight, height, and type of load you need to lift, as well as your preference for portability and safety. From bottle and floor jacks to specialized transmission jacks, each type serves a unique purpose. By considering weight capacity, lifting height, material, and safety features, you can select a hydraulic jack that meets your needs and ensures safe, efficient lifting. Whether you’re a DIY enthusiast or a professional mechanic, the right hydraulic jack is an invaluable tool for any heavy-lifting task.


Welcome to browse our hydraulic jacks and service details of custom hydraulic jacks, contact us.

Friday, June 20, 2025

How Does a Sandblasting Pot Work?


A sandblasting pot, also known as a blast pot or sandblasting machine, is a vital component in the sandblasting process, used to clean, smooth, or etch surfaces by propelling abrasive media at high speeds. The pot operates by pressurizing abrasive particles, such as sand, glass beads, or other materials, and directing them through a nozzle to impact a surface, removing contaminants or creating a desired texture. Understanding how a sandblasting pot works is essential for achieving efficient and safe results, whether for industrial cleaning, surface preparation, or artistic projects.


Components of a Sandblasting Pot


A sandblasting pot is composed of several key parts, each with a specific function:


1. Blast Pot: This main tank or vessel holds the abrasive material. It’s pressurized to release the abrasive media with consistent force.

2. Air Compressor: Provides the pressurized air required to propel the abrasive media. The power and pressure of the air compressor impact the blasting intensity.

3. Abrasive Metering Valve: Controls the flow of abrasive material from the pot to the blasting hose, allowing the user to adjust the amount of abrasive being released.

4. Blasting Hose and Nozzle: The hose directs the abrasive media from the pot to the surface being treated, and the nozzle controls the velocity and dispersion of the abrasive stream.

5. Deadman Switch: This safety device allows the operator to start or stop the blasting process instantly by pressing or releasing the switch.


Sandblasting Pot
The Working Process of a Sandblasting Pot


The sandblasting process relies on pressurized air and abrasive media to achieve the desired surface finish. Here’s a step-by-step explanation of how a sandblasting pot works:


1. Filling the Blast Pot with Abrasive Media


The sandblasting process begins by filling the blast pot with the chosen abrasive material. Common options include silica sand, steel grit, aluminum oxide, and glass beads, each suited for different types of surfaces and finishes. The pot is typically filled with a dry abrasive to prevent clumping and ensure smooth operation.


Tip: Be sure to choose the appropriate abrasive for the surface you’re working on to avoid unintended damage.


2. Pressurizing the Pot


Once the pot is filled, the air compressor is activated to pressurize the pot. This creates a controlled environment where the abrasive material is primed for high-speed ejection. The pressure level is carefully adjusted based on the material of the surface, the abrasive media, and the desired outcome.


Tip: Check the pot and air compressor connections to ensure there are no air leaks, which could reduce efficiency.


60 Gal Sandblast Pot
3. Controlling the Abrasive Flow


The abrasive metering valve controls the amount of abrasive material released into the air stream. By adjusting this valve, operators can regulate the abrasive flow rate to achieve a more delicate or aggressive blast, depending on the surface requirements. Higher flow rates increase the impact but also consume abrasive material faster.


4. Directing the Abrasive with the Nozzle


With the abrasive flow controlled, the mixture of air and abrasive media travels through the blasting hose to the nozzle, where the abrasive stream is directed toward the surface. The nozzle’s design and size play a significant role in determining the blast pattern and intensity:


Narrow Nozzles: Offer a concentrated, powerful blast for removing heavy contaminants.

Wide Nozzles: Create a broader spray pattern for more delicate or widespread surface work.


5. Operating the Deadman Switch


The deadman switch, held by the operator, is pressed to start the flow of abrasive media and released to stop it. This safety feature allows the operator to instantly control the blasting process, providing both convenience and protection. When the switch is released, the airflow stops, preventing accidental damage or wasted abrasive material.


6. Cleaning and Collecting Waste


After sandblasting, the abrasive material and removed contaminants fall to the ground, creating debris. Some sandblasting setups include a recovery system that collects and recycles the abrasive for reuse. Others may require manual cleanup. For projects requiring a clean, controlled workspace, using a blast cabinet or vacuum system may be ideal.


7 Must-Know Pro Tips for Efficient Sandblasting


To achieve the best results with a sandblasting pot, keep these essential tips in mind:


1. Choose the Right Abrasive Material

Select an abrasive material compatible with your surface to avoid unintentional damage. Softer surfaces, like wood, need gentler abrasives, while harder materials, like steel, can handle more aggressive media.

2. Adjust the Air Pressure Appropriately

Too much pressure can damage sensitive surfaces, while too little pressure won’t remove contaminants effectively. Always test your pressure settings on a sample surface to ensure the best outcome.

3. Use Proper Safety Equipment

Always wear protective gear, such as respirators, goggles, and gloves, to shield yourself from abrasive particles and dust during blasting.

4. Check and Maintain Equipment Regularly

Inspect the sandblasting pot, hoses, and valves for wear and tear before use. Replacing worn parts can prevent leaks and improve efficiency.

5. Experiment with Nozzle Angles

The angle of the nozzle can affect how the abrasive impacts the surface. Experiment with different angles to achieve the desired effect, especially when working with intricate surfaces.

6. Monitor Abrasive Flow Rate

Regulate the abrasive flow for better control, reduced wastage, and optimized performance. Adjust the metering valve as necessary to suit each phase of the project.

7. Practice Good Cleanup Habits

After finishing, clean up debris promptly to maintain a safe work area and prepare for the next use. Reclaim and store any reusable abrasive material to save costs.


Frequently Asked Questions About Sandblasting Pots


Q: Can sandblasting damage surfaces?

Yes, if the wrong abrasive or excessive pressure is used, sandblasting can damage surfaces. Always match the abrasive and pressure to the surface material for safe and effective results.

Q: How often should I replace the abrasive in the pot?

It depends on the abrasive type and project requirements. Some abrasives can be recycled several times, while others should be replaced more frequently for optimal performance.

Q: Can I use a sandblasting pot indoors?

Yes, but you must ensure proper ventilation and use a blast cabinet or dust collection system to manage airborne particles and debris.


Understanding how a sandblasting pot works and following these pro tips can help you achieve professional, high-quality results, whether you're using it for industrial purposes or a DIY project. With proper technique, maintenance, and safety precautions, sandblasting can transform surfaces quickly and effectively.

Wednesday, June 18, 2025

​A Guide to Wrenches: How to Choose Wisely

Wrenches are essential tools in any toolbox, whether for professional mechanics, DIY enthusiasts, or homeowners. With so many types of wrenches available, choosing the right one for your project can be overwhelming. This guide will help you understand the different types of wrenches, their applications, and key factors to consider when selecting the right wrench for the job.

Understanding Different Types of Wrenches

There are several types of wrenches, each designed for specific tasks. Knowing the differences between them is crucial for choosing the right tool. Some of the most common types include:


1. Open-End Wrench: This wrench has U-shaped openings on both ends and is used to turn nuts and bolts. Each end is typically a different size, making it versatile for various fastener sizes.

2. Box-End Wrench: With closed-loop ends, the box-end wrench offers better grip and torque for loosening or tightening nuts and bolts. It’s often used in situations where more force is needed.

3. Combination Wrench: This wrench combines an open-end on one side and a box-end on the other, providing the best of both worlds. It’s a versatile option for many types of jobs.

4. Adjustable Wrench: Also known as a crescent wrench, this tool has an adjustable jaw, allowing it to fit various sizes of nuts and bolts. It's perfect for those who need a single tool for multiple fastener sizes.

5. Socket Wrench: A socket wrench, or ratchet wrench, uses a ratcheting mechanism that allows the user to turn a fastener without repositioning the wrench. It’s often used for automotive and mechanical work.


Factors to Consider When Choosing a Wrench


Choosing the right wrench depends on several factors, including the size of the fastener, the task at hand, and the material you’re working with. Here are the key considerations:


1. Fastener Size: Always match the wrench size to the fastener size. Using the wrong size can damage the fastener or the tool, and make the job more difficult. If you need versatility, an adjustable wrench or a set of combination wrenches is a great option.

2. Type of Work: The type of wrench you choose should match the specific task. For example, if you're working on plumbing, a pipe wrench is ideal, while an automotive project might require a socket or ratchet wrench.

3. Material and Durability: Consider the material of the wrench. Wrenches made from chrome-vanadium steel are highly durable and resistant to corrosion, making them ideal for long-term use in tough environments.

4. Comfort and Grip: A good wrench should be comfortable to use, especially for prolonged tasks. Look for wrenches with ergonomic handles that reduce hand fatigue and provide better control.


When to Use a Specific Wrench?


Different wrenches are designed for specific tasks, so it's important to know when to use each type:


1. Open-End Wrench: Best for use in tight spaces where a box-end wrench cannot reach. It’s commonly used for plumbing or automotive repairs where two sizes are needed.

2. Box-End Wrench: Ideal for heavy-duty tasks where maximum torque is required. Its enclosed design prevents slipping and is useful for fastening stubborn nuts and bolts.

3. Adjustable Wrench: Perfect for quick fixes where you need to work with different fastener sizes without switching tools. It’s commonly used for household tasks like assembling furniture or working on bikes.

4. Socket Wrench: Essential for mechanical tasks, especially in automotive work, where fasteners need to be tightened or loosened without constant repositioning. Its ratcheting mechanism saves time and effort.


USA Type Adjustable Wrench


How to Maintain Your Wrenches?


Maintaining your wrenches is essential to ensure they perform well over time. Here are some tips to keep your tools in good condition:


1. Clean After Use: Always clean your wrenches after each use, especially if they’ve been exposed to oil, grease, or dirt. Wipe them down with a clean cloth and use a degreaser if necessary.

2. Store Properly: Keep your wrenches in a dry, organized space to prevent rust and damage. Consider using a tool chest or wall-mounted tool organizer to ensure easy access and protection.

3. Lubricate Moving Parts: For adjustable and socket wrenches, regularly lubricate the moving parts to keep them operating smoothly. This helps prevent wear and tear on the tool.


Questions and Answers About Wrenches


Q: What is the most versatile wrench to have?

A: The adjustable wrench is the most versatile tool, as it can be adjusted to fit a wide range of fastener sizes. It’s perfect for general household tasks and DIY projects.


Q: What size wrench do I need?

A: The size of the wrench depends on the size of the fastener you’re working with. It’s always a good idea to have a set of combination wrenches or an adjustable wrench to cover various sizes.


Q: How do I prevent my wrenches from rusting?

A: Store your wrenches in a dry place, and make sure to clean and dry them after use. You can also apply a light coat of oil to prevent rust, especially if the wrenches are stored in a humid environment.


Q: Can I use an adjustable wrench for everything?

A: While adjustable wrenches are versatile, they are not always the best choice for high-torque tasks. In such cases, a box-end or socket wrench may be more suitable to prevent damage to the fastener or the tool.

Friday, February 14, 2025

What is the Purpose of a Screw Air Compressor?

 A screw air compressor is a vital component in numerous industrial and commercial applications. Understanding its purpose and functionality can greatly enhance operational efficiency and productivity. This article delves into the various purposes of a screw air compressor, its advantages, and common uses.


Understanding the Basics of Screw Air Compressors


Screw air compressors utilize a pair of helical screws to compress air. This mechanical process distinguishes them from conventional piston-based compressors. As the screws rotate, air is drawn in, compressed, and subsequently discharged. This method ensures a continuous flow of high-quality compressed air, leading to enhanced efficiency.


The Main Purpose of Screw Air Compressors


The primary aim of a screw air compressor is to provide a reliable and consistent source of compressed air for various industrial uses. This includes powering pneumatic tools, material handling systems, and other machinery requiring compressed air as a pressurizing medium. The steady airflow provided by a screw compressor makes it ideal for continuous operations, which places it ahead of other compressor types in many settings.

Screw Air Compressor

Screw Air Compressor

Benefits of Using Screw Air Compressors


Several advantages make screw air compressors a popular choice in various industries:


  • Efficiency: Screw compressors operate at lower RPM compared to piston compressors, leading to reduced energy consumption.

  • Durability: They are built with robust components, allowing them to withstand demanding conditions and operate efficiently for longer periods.

  • Less Maintenance: With fewer moving parts, screw compressors often require less maintenance than their piston counterparts.

  • Noise Level: They typically operate more quietly, which is essential for maintaining a conducive working environment.


Common Applications of Screw Air Compressors


From manufacturing plants to small workshops, screw air compressors find applications across various industries:


  • Manufacturing: Used to operate assembly lines and power pneumatic machinery for tasks such as drilling or cutting.

  • Automotive: Essential in automotive repair shops for powering tools and air-driven machinery.

  • Construction: Used to power nail guns, air hammers, and other pneumatic tools on construction sites.

  • Food and Beverage: Employed in packaging and processing, ensuring that compressed air is free from contamination.


How Do Screw Air Compressors Compare to Other Types?


When comparing screw air compressors to piston and diaphragm compressors, screw models generally provide greater efficiency and lower operational costs. While piston compressors discharge air in bursts, which may cause fluctuations in pressure, screw compressors deliver a steady flow, essential for industrial applications that require constant pressure and volume. Additionally, screw compressors often feature advanced technologies that improve performance and energy efficiency.


Frequently Asked Questions


  1. What is the average lifespan of a screw air compressor?

  2. The average lifespan is around 10-15 years, particularly with regular maintenance.

  3. Are screw air compressors energy-efficient?

  4. Yes, screw compressors are known for their energy efficiency, reducing operational costs significantly.

  5. How loud are screw air compressors?

  6. They typically operate at lower noise levels compared to other compressors, making them suitable for indoor use.

  7. What sizes do screw air compressors come in?

  8. They are available in various sizes, from compact units for small workshops to large-scale systems for industrial plants.

  9. Can screw air compressors be used in cold environments?

  10. Yes, but specific adaptations may be needed to maintain performance in extreme temperatures.


Conclusion


In summary, screw air compressors play an essential role in a wide array of applications, providing reliable and efficient compressed air solutions. Their advantages, including efficiency, durability, and less maintenance, make them highly sought after in industrial settings. Whether in manufacturing, automotive, or construction, understanding the purpose of a screw air compressor can enhance operational effectiveness and ultimately contribute to the overall success of an enterprise.

Tuesday, February 11, 2025

Buying Tungsten Carbide Burs - 4 Tips and Things To Know

 Tungsten carbide burs are essential tools for various industries, including dentistry, metalworking, and jewelry making. Known for their durability and precision, these burs are used for cutting, shaping, and grinding hard materials. Choosing the right tungsten carbide burs can significantly impact the quality of your work and the lifespan of the tools. This guide provides key tips and insights to help you make an informed decision when purchasing tungsten carbide burs.


1. Understand the Different Types of Tungsten Carbide Burs


Know the Shank Types: Tungsten carbide burs come in different shank types, including friction grip (FG), latch-type (RA), and straight handpiece (HP) shanks. Selecting the right shank type depends on the equipment you are using. For example, FG burs are commonly used in high-speed dental handpieces, while RA burs are suitable for low-speed contra-angle handpieces.


Choose the Right Head Shape: Tungsten carbide burs are available in various head shapes, such as round, flame, cylindrical, and cone. Each shape serves a specific purpose, so choosing the right one depends on the task at hand. For instance, round burs are ideal for creating concave shapes, while cylindrical burs are used for smoothening and trimming flat surfaces. Understanding the different head shapes and their applications will help you select the most suitable burs for your needs.

Cylindrical Type Tungsten Carbide Burs

Cylindrical Type Tungsten Carbide Burs

2. Pay Attention to the Bur's Grit and Cutting Edges


Determine the Grit Level: The grit level of tungsten carbide burs affects the smoothness of the cut and the finish on the material. Coarse burs have larger cutting edges, making them suitable for rapid material removal. Fine burs, on the other hand, have smaller cutting edges for precision work and creating a smoother finish. Depending on your application, you may need to choose between coarse, medium, and fine grit burs to achieve the desired results.


Check the Cutting Edges: Tungsten carbide burs can have single, double, or cross-cut cutting edges. Single-cut burs produce a smooth finish and are often used for general shaping. Double-cut burs have crisscrossed cutting edges, allowing for faster material removal and reducing vibration during use. Cross-cut burs provide an even finer finish, making them ideal for delicate tasks that require high precision. Understanding the differences between these cutting edges will help you choose the burs that best match your work requirements.


3. Consider the Quality and Brand of the Burs


Look for High-Quality Material: Not all tungsten carbide burs are created equal. High-quality burs are made from premium tungsten carbide material, offering superior durability and cutting performance. Investing in high-quality burs will ensure a longer lifespan, reduced wear and tear, and consistent performance. Low-quality burs may wear out quickly, leading to poor results and increased costs in the long run.


Choose a Reputable Brand: The brand you choose plays a significant role in the quality and reliability of the tungsten carbide burs. Reputable manufacturers adhere to strict quality control standards and use advanced manufacturing techniques to produce high-performance burs. Researching and selecting a trusted brand can give you confidence in the product's performance and ensure you get value for your investment.

Cylindrical Type Tungsten Carbide Burs

Cylindrical Type Tungsten Carbide Burs

4. Evaluate the Compatibility with Your Equipment


Check the Shank Size: Tungsten carbide burs come in different shank sizes, such as 1/4-inch, 1/8-inch, and 3/32-inch. It's essential to choose burs that are compatible with your specific equipment. Using the correct shank size ensures a secure fit in the handpiece and minimizes the risk of damage to both the bur and the equipment.


Ensure Proper Fit and Balance: An improper fit or imbalance can lead to excessive vibration, reduced control, and potential damage to the material being worked on. Before purchasing, verify that the tungsten carbide burs are designed to fit your handpiece correctly. This not only ensures optimal performance but also enhances safety during use.


Frequently Asked Questions About Tungsten Carbide Burs


Q1: Can tungsten carbide burs be used on all materials?

A: Tungsten carbide burs are versatile and can be used on a wide range of materials, including metals, ceramics, plastics, and wood. However, they are most commonly used for cutting and shaping hard materials like metal and ceramics due to their hardness and durability.


Q2: How do I maintain tungsten carbide burs for a longer lifespan?

A: To extend the lifespan of tungsten carbide burs, clean them regularly to remove debris and residue. Use appropriate cleaning solutions and brushes to avoid damaging the cutting edges. Additionally, avoid applying excessive pressure during use, as this can cause premature wear and reduce the bur's efficiency.


Q3: How often should tungsten carbide burs be replaced?

A: The replacement frequency depends on the intensity of use and the materials being worked on. Regularly inspect the burs for signs of wear, such as dullness, chipping, or reduced cutting performance. Replacing worn burs promptly ensures consistent results and prevents damage to the workpiece.


Conclusion


When buying tungsten carbide burs, it's crucial to consider factors such as bur type, grit level, quality, and compatibility with your equipment. By understanding these aspects and selecting the right burs for your needs, you can achieve precise and efficient results while extending the lifespan of your tools. Investing in high-quality tungsten carbide burs from reputable brands ensures reliable performance, whether you're using them for dental procedures, metalworking, or other applications.

Saturday, February 8, 2025

What Not to Do With a Floor Jack?

 A floor jack is an essential tool for lifting vehicles safely and effectively during maintenance or repair work. However, improper use of a floor jack can lead to dangerous situations, damage to the vehicle, or injury. Understanding the dos and don’ts of floor jack usage is crucial for ensuring safety and maintaining the longevity of your equipment.


In this guide, we’ll cover what you should avoid when using a floor jack to ensure safe operation and prevent accidents or damage.


1. Don’t Lift a Vehicle on an Uneven Surface


One of the most important rules for using a floor jack is to ensure the surface you are working on is level and stable. Using a floor jack on uneven ground, such as a sloped driveway, gravel, or dirt, can cause the jack to become unstable and potentially tip over. This instability increases the risk of the vehicle falling, which can lead to serious injury or damage.


Always use a floor jack on a flat, solid surface like a garage floor or a paved driveway. For additional safety, make sure to chock the wheels that remain on the ground to prevent the vehicle from rolling while lifted.

2.25 Ton Hydraulic Floor Jack

2.25 Ton Hydraulic Floor Jack

2. Don’t Exceed the Floor Jack’s Weight Capacity


Each floor jack is designed to lift a specific amount of weight, known as its weight capacity. Exceeding this limit can cause the jack to fail, resulting in the vehicle falling unexpectedly. It's crucial to check the weight capacity of your floor jack and ensure it is sufficient to handle the weight of the vehicle you are lifting.


Before lifting, consult your vehicle’s manual to determine its weight and ensure it does not exceed the floor jack’s capacity. Typically, jacks come with ratings like 2-ton, 3-ton, or 4-ton, so always choose the appropriate one for your needs.


3. Don’t Crawl Under the Vehicle Without Jack Stands


One of the most dangerous mistakes you can make is working under a vehicle supported only by a floor jack. A floor jack is not designed to hold a vehicle for extended periods or as a substitute for jack stands. Hydraulic jacks can fail without warning, causing the vehicle to drop suddenly.


Always use jack stands to support the vehicle after lifting it with a floor jack. Place the jack stands under secure lifting points, as specified in your vehicle’s manual, and lower the vehicle onto the stands before working underneath. Never trust the floor jack alone to support the weight of the vehicle while you’re working.


4. Don’t Use the Wrong Lifting Points


Vehicles have designated lifting points that are reinforced to handle the weight of the car when being raised by a jack. Using a floor jack on the wrong part of the vehicle, such as under a body panel or exhaust system, can result in damage to the car and create unsafe lifting conditions.


Refer to your vehicle’s manual to locate the proper jack points. Using the correct lifting points ensures that the vehicle is balanced and prevents damage to its frame or other components.

2 Ton Hydraulic Floor Jack

2 Ton Hydraulic Floor Jack

5. Don’t Rush the Lifting Process


Rushing while using a floor jack can lead to errors and accidents. Taking shortcuts, such as lifting the vehicle too quickly or not ensuring the jack is securely positioned, can create unsafe conditions.


When using a floor jack, take your time and follow the proper procedures. Slowly raise the vehicle to avoid shifting or instability, and make sure the jack is centered under the lifting point before applying pressure.


6. Don’t Neglect Floor Jack Maintenance


Like any tool, a floor jack requires regular maintenance to function properly. Neglecting maintenance can lead to hydraulic leaks, broken seals, or other malfunctions that compromise the jack’s performance.


Regularly inspect your floor jack for signs of wear, such as leaking hydraulic fluid, rust, or bent parts. Keep the jack clean, lubricate its moving parts, and store it in a dry, secure place when not in use. Following the manufacturer’s maintenance guidelines will help extend the life of your floor jack and ensure it operates safely.

Long Floor Jack

Long Floor Jack

7. Don’t Overlook the Importance of Wheel Chocks


Before lifting your vehicle, it’s essential to use wheel chocks to prevent the vehicle from rolling. This is particularly important when lifting one end of the car, as the remaining wheels on the ground can move if not properly secured.


Place wheel chocks on both sides of the wheels that remain on the ground. This simple step helps prevent accidental movement and keeps the vehicle stable during the lifting process.


8. Don’t Leave the Vehicle Unattended While It’s Lifted


Once your vehicle is lifted, it’s important not to leave it unattended for an extended period. The longer the vehicle remains elevated, the higher the risk of the jack or jack stands shifting or failing.


If you need to step away from the vehicle for any reason, make sure it is securely supported by jack stands. Never leave a vehicle raised on a floor jack without additional support for extended periods.


Questions and Answers


**Q: How much weight can a floor jack lift?**

A: The weight capacity of floor jacks varies, but common ratings include 2-ton, 3-ton, and 4-ton jacks. Always choose a jack with a capacity that exceeds the weight of your vehicle to ensure safe lifting.


**Q: Can I leave my vehicle on a floor jack overnight?**

A: No, it’s not safe to leave a vehicle supported solely by a floor jack for extended periods. Use jack stands to support the vehicle if it needs to remain lifted for any length of time.


**Q: What should I do if my floor jack starts leaking hydraulic fluid?**

A: If your floor jack is leaking hydraulic fluid, stop using it immediately. A leak can indicate a problem with the jack’s seals or internal components. Have it inspected and repaired by a professional before using it again.


Conclusion


Using a floor jack properly is essential for ensuring your safety and the integrity of your vehicle. Avoiding common mistakes such as lifting on uneven surfaces, exceeding weight limits, or failing to use jack stands can help prevent accidents and prolong the life of your equipment. By following the guidelines outlined in this article, you can safely and effectively use your floor jack for vehicle maintenance and repairs.